
Mostly the people have to face the common error like Memory Leak, high CPU usage or high RAM usage on their Windows 10 system. If you are windows 10 user and recently upgrade your OS then such a situation the RAM usage of your system goes high and thus limits the performance of your system But if you too are facing memory leak after Windows 10 update, then you are not alone. Here’s quick solution for you, so follow the below given methods to solve it.
Quick ways to Fix Memory Leak in Windows 10
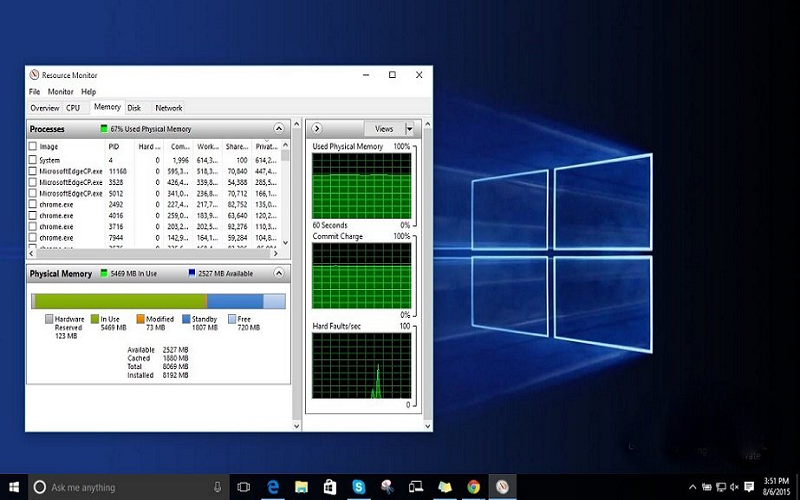
If you have a recently install high-performance software on your windows system, then it causes Memory leaks issues that are using more RAM and it slows down your system, thus affecting its performance. It is also known as memory loss due to which you cannot flat perform the critical task effectively. While fortunately one of the inbuilt tools like Task Manager which will very helpful for you to keep a check on the programs using more RAM. And so here are some quick ways by which you can quickly fix memory leak in Windows 10.
Solution 1- By Disable Startup Program to Fix Memory Leak
If you have a boot your system, then it happens that some of the programs start loading automatically or slow down you know. So in this situation you face the memory leak issues in Windows 10 OS and thus to speed up your system you can try disabling the Startup programs.
Step 1: On your Windows 10 Screen, First Open Task Manager by right-clicking on the space of the Taskbar.
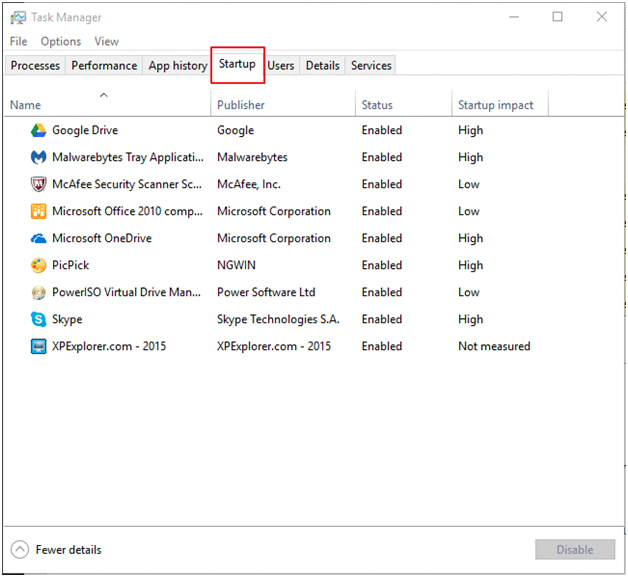
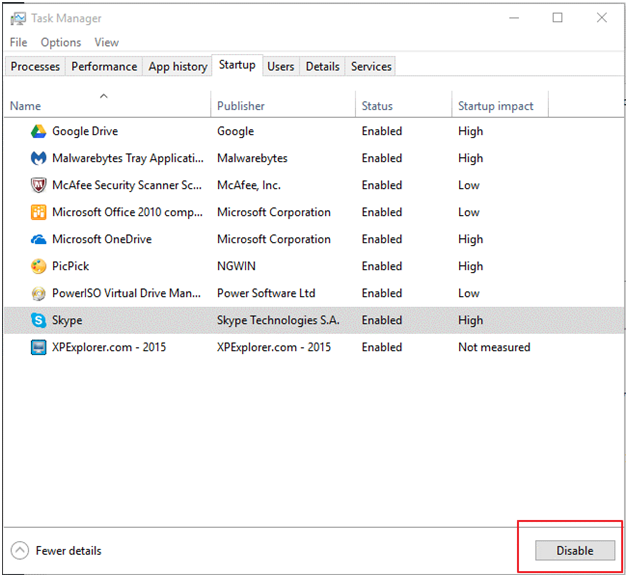
Step 2: Now In the Task Manager window, Just click on the Startup tab. After that start selecting the programs that you think can affect the CPU or RAM usage.
Step 3: After next step to Right-click on the programs. Then click on Disable option.
Solution 2- Remove Malware to Fix Memory Leak Issue in Windows 10
After the Windows 10 Fall Creators Update, and I think it is possible to memory leak is caused due to some malware virus. So here’s the best way to troubleshoot the issue is o runt eh anti-malware software installed on your system. So first clean out the malicious software on your system. So it gives an opinion that you keep your anti-malware program up-to-date.
Solution 3- Disable Runtime Broker to Resolve Memory Leak
Here in this method memory leak in Windows 10 can happen due to the Runtime broker as this system process get up a lot of memory resources. So first you want to disable the Runtime Broker by following the steps given.
Step 1: First of all Launch Task Manager by pressing the Ctrl+ Shift+ Esc key at the same time. Then click on the Processes tab.
Step 2: Now locate Runtime Broker on the list. Right, click on it.
Step 3: Click on End Task.
Step 4: Reboot your system to check if the memory leak problem persists.
Solution 4- Fix memory Leak by Updating Faulty Drivers
There are many reasons behind occurring memory Leak issues on your Windows 10 system so here’s some errors reported after the Windows 10 update is due to the out-of-date, missing or faulty driver or software.
So when you are facing the memory leak issue after upgrading your OS, then it is maybe due to outdated drivers. The drivers that you need to check for the memory leak issue are sound, video and network drivers. And so you should update all your drivers.
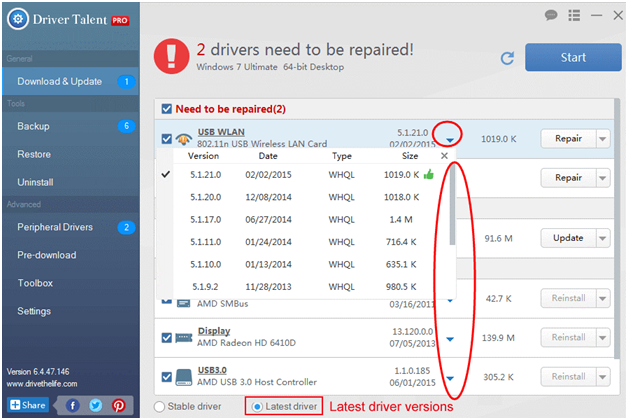
Also, you can also take help from authentic driver updating tools like Driver Easy or Driver Talent.
Solution 5- Adjust for Best Performance to Fix Memory Leak
If above given all solution not working for you then try out this Adjust for Best Performance to Fix Memory Leak. This is the last solution that you can try to decrease high CPU usage after Windows 10 Anniversary update.
Step 1: First Press Windows key+ Pause Break at the same time. Then on the left pane, locate Advanced System settings. Click on it.
Step 2: Then click on the Advanced tab. And select Settings option under the Performance bar.
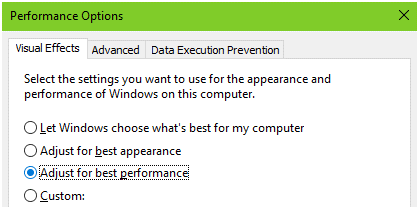
Step 3: Now click on Virtual Effects tab. Under this check the Adjust for best performance option.
Step 4: Now save the changes made by clicking on Apply. Then press Ok. Also, click on the ok option in the System Properties box.
That’s it,
I hope that all above-given solution work for you and fix out memory leak after updating to the latest version of Windows. If you have a any query about, then let me know us in below comment section.