
While using the Google Chrome browser, you might have faced an error named “Rats! WebGL hit a snag.” This error occurs when the WebGL data is not supportable with the browser or if there is an error in it. The error of “WebGL Hit a Snag” will continue to come when the Chrome browser tries to access WebGL on any site.
In this post, we have provided a simple guide that will provide you all the necessary step that you can follow to fix this online graphics rendering error on Google Chrome Browser. Before heading to the tutorial to solve the error ‘rats WebGL Hit a Snag, we should know the basics like what is WebGL.
What is WebGL?
WebGL is a short term name of Web Graphics Library and it is a Javascript API that Renders interactive 3D and 2D computer graphics on any web browser. WebGL is Compatible to cater to these functions without requiring any plug-ins or add-ons.
The Graphics Processing Unit (GPU) of the computer helps in the execution of WebGL codes mentioned in Javascript and it allows all the supportable browsers like Google Chrome to display 2D and 3D graphics without requiring any additional plug-ins or tools.
How to Fix Rats! WebGL Hit a Snag in Easy Steps
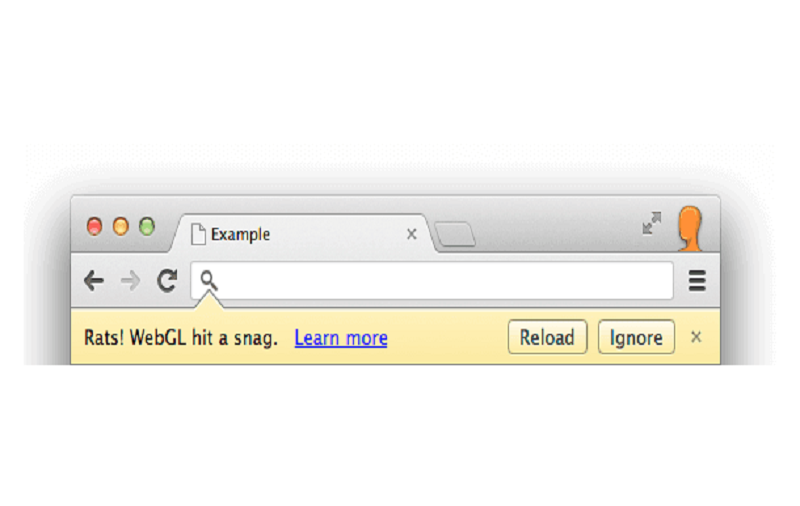
As we mentioned in the introduction of this article that “Rats! WebGL hit a snag” an error that popup usually when WebGL tries to load and render graphics in the Google Chrome browser. Once, this problem has occurred the error message saying “rats! WebGL hit a Snag” will keep on showing up on your browser when your web browser tries to make use of WebGL to render graphics.
Even refreshing and reloading the website will not solve this error of WebGL hit a snag. So in order to solve this error, you need to follow the solutions and methods given below.
Ways to Fix WebGL Hit a Snag
Method 1 – Update Google Chrome Browser
We shall start with the basic troubleshooting to fix WebGL hit a snag. When your web browser has not been updated for a long time; it might be possible that outdated browser is incompatible with WebGL content and it causing WebGL hit a snag error.
So first thing you should follow to solve this error is to update the browser to the latest version and it may solve the error.
Follow the steps given below to learn how to update Google Chrome Browser:
- Open Google Chrome Browser
- Click on the three vertical dots at the top right corner and it will open a drop-down menu.
- In the drop menu, tap on “Help” and a new side drop menu will appear.
- In the side drop menu, click on “About Google Chrome” and it will automatically check for updates and you will be asked to install if a new update is available.
- Once the update is completed, re-launch the browser and your problem will be solved.
If your browser is already updated to the latest version then, try the next method.
Method 2 – Enable Hardware Acceleration in Google Chrome Browser
Users can fix the “WebGL hit a snag” error if hardware acceleration in Google Chrome is enabled. This is one of the best and simple methods to solve this error. This troubleshooting will allow Google Chrome to access the computer’s GPU when it is rendering WebGL content from online.
Follow the easy steps given below to solve the error “WebGL Hit a Snag” by accelerating hardware in Chrome.
- Open Google Chrome Browser
- Click on the three vertical dots at the top right corner and it will open a drop-down menu and click on “Settings” from the drop-down menu
- Scroll down to the end of the page and click on “Advanced” to open advanced settings
- Now find the setting name “Use hardware acceleration when available” under the “System” tab and enable it.
- Re-launch the browser and your problem will be solved
Making these changes will solve the error, try loading the website again. If the problem still occurs even after making these changes in settings or the “use hardware acceleration when available” was already enable then jump to the next method to solve WebGL hit a snag.
Method 3 – Reset the Enabled Flags in Google Chrome
In case, the above methods didn’t work for you, then you can try fixing this error by resetting the enabled flags in the browser. If you think that your Windows system may not handle WebGL content, then you can disable it later.
Follow the easy steps given below to solve the error “WebGL Hit a Snag” by to resetting your enabled flags in Chrome:
- Open Google Chrome browser
- Type chrome://flags in the URL bar and hit the Enter button
- A setting page with all the available Chrome flags will appear
- Beside the search bar, you shall see an option of “Reset all to default” click on it.
- If you want to disable WebGL content in Chrome; search for the option called “WebGL Draft Extensions” and disable it
- Re-launch the browser and your problem will be solved.
This troubleshoot may help you to solve the error. If still, you are facing this error on your web browser then we would recommend you to jump on our next solution.
Method 4 – Reset the Google Chrome Browser
The error can be the result of some intentional changes in the setting of the Google Chrome and it is hard to find the specific setting that is causing the error. So, resetting Google Chrome can fix the error of WebGL Chrome error.
Follow the steps given below to reset Google Chrome:
- Open the Google Chrome browser
- Click on the three vertical dots at the top right corner and it will open a drop-down menu and click on “Settings” from the drop-down menu
- Scroll down and click on “Advance” to open other settings and find the option Reset and then click on it
The reset will set your browser to the default settings just like the newly installed version. Now close and launch the browser and try to load the website again.
Final Words…
The Chrome error WebGL hit a snag is not that usual error that can harm your system but it is annoying to get such error every time you load the website. Any of these four methods will help you solve this error, if you still face this error then, we would recommend you to completely uninstall Google Chrome Browser from your computer and re-install it from its official site again.