
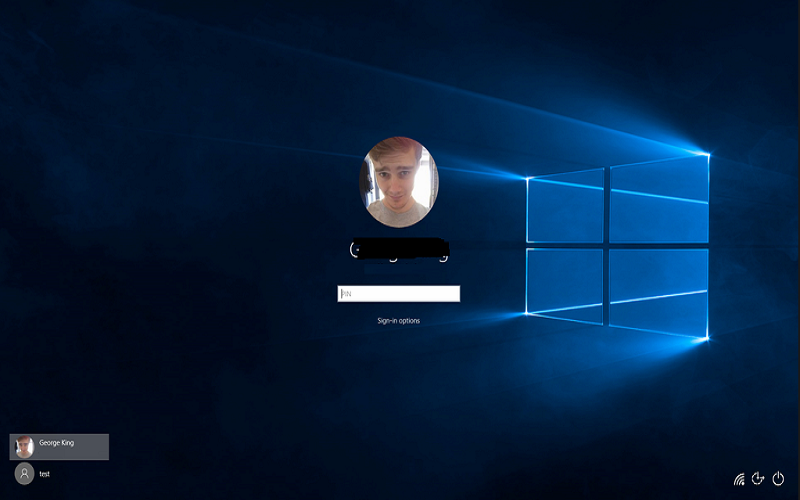
If you want to set auto login to your PC then Windows 10 is getting a new feature to easy configure on your desktop and automatically Login to the desktop or Start screen without requiring your account password to enter.
So what’s a benefit to Configuring Windows 10 to automatically sign-in? Like we can easy to log in, very fast to unlocking or is you don’t need to remember the password, which also means that you quick login and to save a couple of seconds during the boot.
Here’s the best way to set up Auto Login In Windows 10 and it’s also too similar to the one in Windows 7 and Windows 8.
In this method for a local user account and Microsoft account, that means you don’t want to go any other site just follow the steps and enable Auto Login In Windows 10.
Method 1: Enable Auto Login without password:
Steps to follow and setup automatically login to Windows 10 without entering the password.
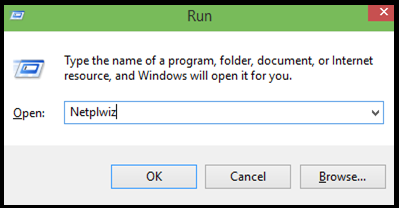
1#: Open Run command box by at the same time pressing Windows logo and R keys (Windows+R). In the Run dialogue box, type netplwiz and then press Enter key.
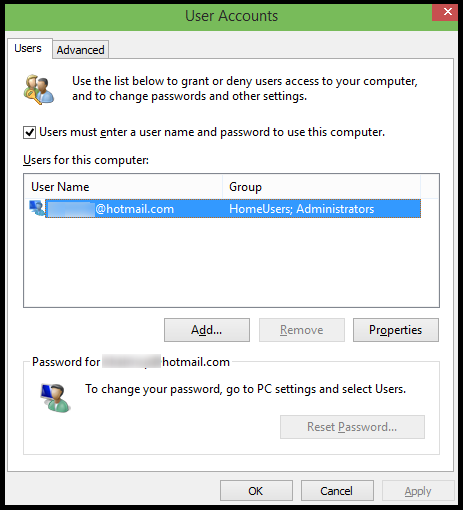
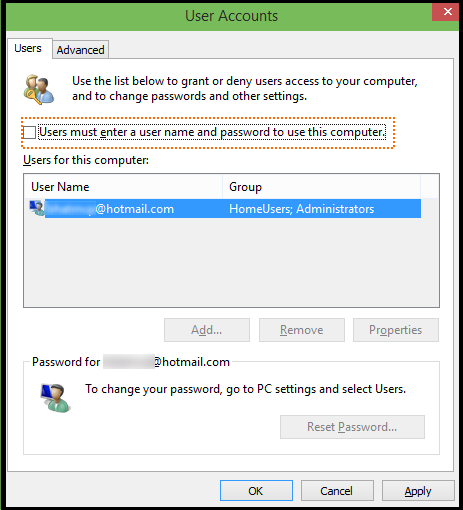
2#: Now you can see the User Accounts dialog box, select your user account first and then uncheck the option labelled Users must enter a username and password to use this computer. Click Apply button to see Automatically sign in box.
3#: Automatically sign in dialog Box, type your password and then re-enter the password to confirm the same.
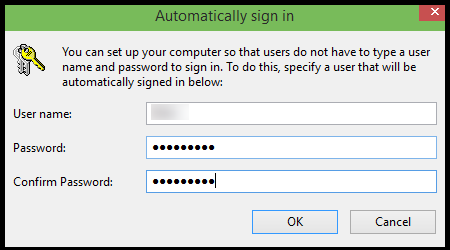
4#: Tap OK button.
Method 2: Set Auto Login using Registry
If you are facing some problem by using above method then you must follow this method how to Set Auto Login using Registry
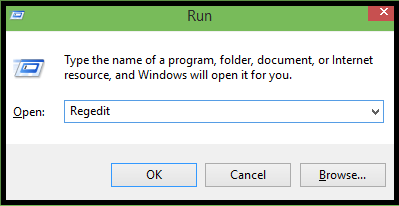
1#: Open Registry Editor By type Regedit in the Start menu search box or Run command box and then press Enter key. Click Yes button when you see the UAC (User Account Control) box.
2#: Now Navigate to the HKEY_LOCAL_MACHINE\SOFTWARE\Microsoft\Windows NT\CurrentVersion\Winlogon
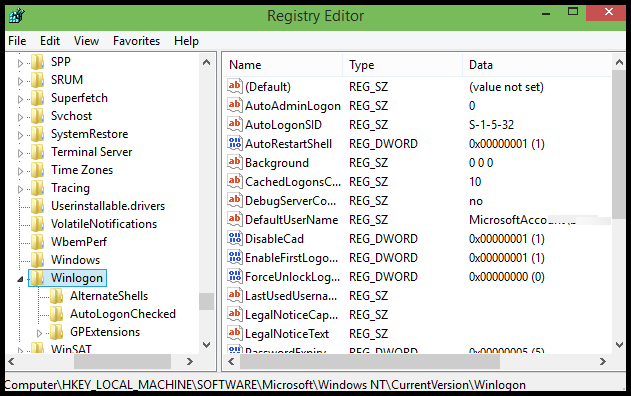
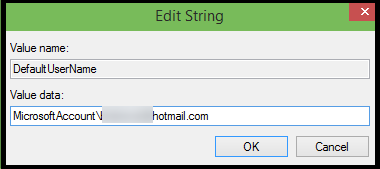
3#: Next to, look for the entry named DefaultUserName, double-click on it and make sure that your Microsoft account or local user account name is appearing under Value data box.
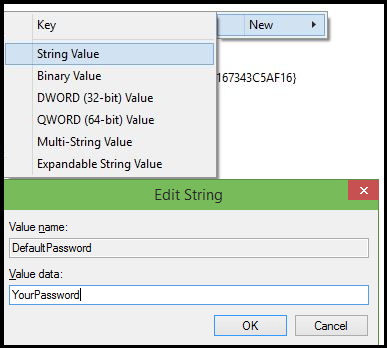
4#: Right-side again, looks for the entry named DefaultPassword. If the entry doesn’t exist, please create one by right-clicking on the empty space, clicking New and then clicking String Value. Rename it to DefaultPassword and enter your password in the Value data box. Click OK button.
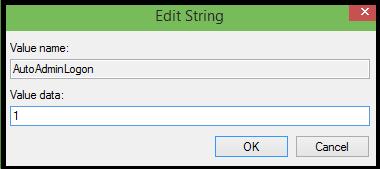
5#: Now you need to enable automatic login. look for the entry labelled Auto Admin Login and then change its value from 0 (zero) to 1 (one).
Now it’s done! And first, restart your PC and see your Windows 10 automatically logging into your account without asking you to enter the password.
Method 3: Set Auto Login using Autologon
Using Autologon software you can easy to set up automates the login process in Windows 10. Auto logon is a free tool from Microsoft designed to help you skip the lock and login screen in Windows 10.