
Visual Studio Code (VS Code) is a powerful, open-source code editor that supports hundreds of programming languages. It offers features like syntax highlighting, bracket-matching, auto-indentation, and more, making it a favorite among developers. However, installing VS Code on an Android device is not as straightforward as on a desktop operating system. So, here we have tried to make this process simple for you.
Step 1: Install Termux
The first step in installing VS Code on an Android device is to install Termux. Termux is an Android terminal emulator and Linux environment app that works directly with no rooting or setup required.
To install Termux, you need to download it from a trusted source. It’s important to note that you should not install it from the Play Store or other sources, as it may not work correctly. After downloading the Termux APK file, open it and install the app. If prompted to install from a third party, confirm the action.
Step 2: Install Ubuntu Using Termux
Once Termux is installed, the next step is to install Ubuntu. This is done using a series of commands in the Termux terminal. The first command to run is pkg update, which updates the package list.
Next, run pkg upgrade to upgrade all the installed packages. After that, install the proot-distro package, which will help in installing Ubuntu. You can do this by running the command pkg install proot-distro.
After installing proot-distro, you can install Ubuntu by running the command proot-distro install ubuntu. This command will start downloading and installing Ubuntu on your device.
Step 3: Download Code Server
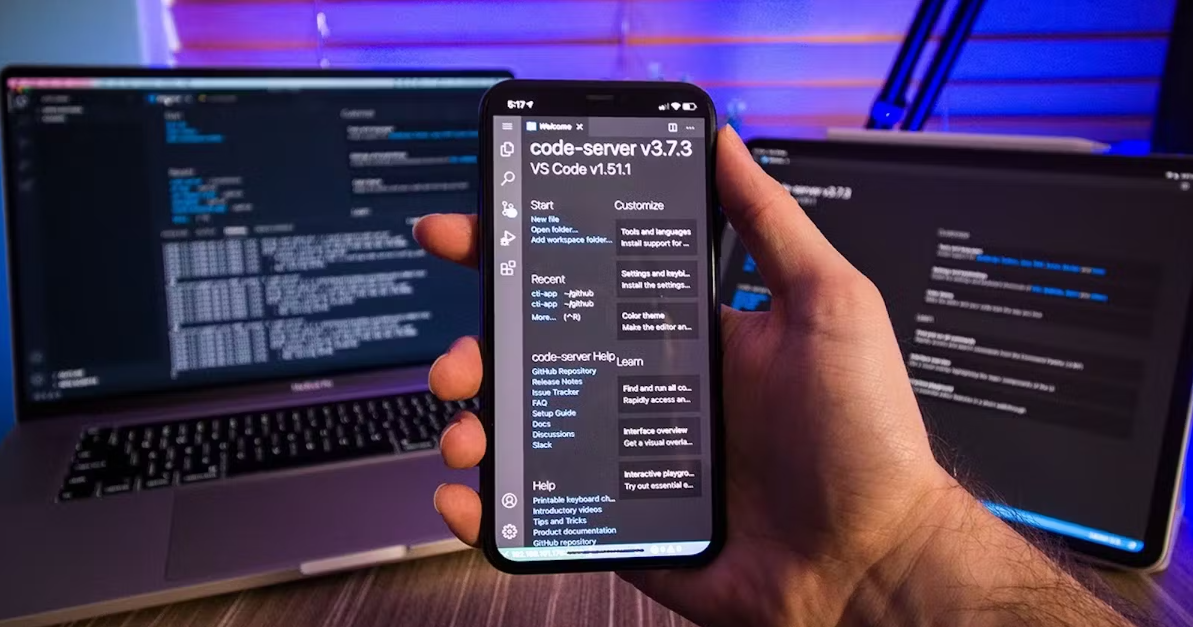
With Ubuntu installed, the next step is to download the code server. The code server is a version of VS Code that runs on a remote server and allows access through a web browser.
Before downloading the code server, you need to update the package list and upgrade the installed packages in Ubuntu. This is done by running the commands apt update and apt upgrade.
Next, install wget, a utility for non-interactive download of files from the web. This can be done by running the command apt install wget. After installing wget, you can download the code server by running the command wget https://github.com/cdr/code-server/releases/download/v3.12.0/code-server-3.12.0-linux-arm64.tar.gz.
Step 4: Unzip and Install Code Server
After downloading the code server, the next step is to unzip the downloaded file. This can be done by running the command tar -xvf code-server-3.12.0-linux-arm64.tar.gz.
Once the file is unzipped, you can install the code server by running the command ./code-server-3.12.0-linux-arm64/code-server –bind-addr 0.0.0.0:8080. This command will start the code server and bind it to port 8080.
Step 5: Access VS Code
With the code server running, you can now access VS Code through a web browser. Open a web browser on your device and navigate to http://localhost:8080. This will open VS Code in your browser, and you can start coding.
Install Extensions
Just like desktop VS Code, you can install extensions in the web version to add additional functionality. Go to the Extensions view and search for extensions. Popular extensions like Python, Markdown All in One, ES7 React/Redux can be installed.
Limitations
Code-server tries to provide a browser-based VS Code experience but has some limitations compared to desktop app:
- Debugging support is limited
- Extension support is limited
- Performance is reduced compared to the native app
Overall, code-server provides a quick way to get VS Code editing experience on Android. For advanced coding and debugging, use VS Code on a desktop/laptop computer.
Final Words
Installing VS Code on an Android device involves several steps, but it’s a straightforward process when you follow them in order. With VS Code installed, you can enjoy the power and flexibility of this popular code editor on your Android device. Whether you’re a professional developer or a coding enthusiast, VS Code on Android offers a convenient way to code on the go.