
Well, all have known that the Microsoft has to release the new operating system windows 10. But if you are currently running on windows 7 and want to update the windows 7 to windows 10 then it’s effortless. Also, the Windows 10 OS is very cool design interface so you can easy to use it. Whenever you update to window 10 at a time they have seen many issues like taskbar is not working, Driver Not Working correctly, Driver Power State Failure. So if you are updated your system to Windows 10 and facing the issue like taskbar is not working and you have don’t know about it how to fix then just follow this article, here we will show you tips and whole information about How to Fix Windows 10 Taskbar not working.
Fix Windows 10 taskbar not working

Here are 4 simple way to fix out taskbar not working in Windows 10 problem.
Solution 1: By restarting your Windows 10
Just rebooting your Windows 10 system and fix out your taskbar problem. It’s very easy and also a time-saving task. I always suggest to many people, when you were facing the issues like Windows 10 taskbar not working or any other then first you have to do one task restart your system.
So just restart your windows 10 desktop and after you get fresh and clean windows 10 system. This is the simplest solution solve the Windows 10 taskbar not working issue.
If you are not able to restart your system manually, then you can also reset your system by following the below given steps. You just have to follow this step:
Step 1: Hit “Cntrl+Shift+Esc” key together
Step 2: Task Manager dialogue box appears.
Step 3: Select process tab.
Step 4: Select Windows option.
Step 5: Restart your Windows 10 device.
That’s it after restart your windows 10 system, and you will fix out taskbar Windows 10 issue.
If restarting your system didn’t work for you. Don’t worry here are another solution too, you can try them too.
Solution 2: By installing the updated version of drivers
So here by installing the updated version of drivers, you can easy to fix out Windows taskbar not working issue.
When you start your system at the time you face this error is because of the software driver. There are many reasons behind you get this issue, but if your software drivers are outdated, then it happens every time. So to resolve Taskbar not working in Windows 10 you have to update the version of software drivers.
Here are the given steps for download the latest version of drivers so you easy to taskbar not working issue on windows 10.
Step 1: At first, you have to identify the Outdated Drivers.
The scanning will also help you in providing all the details about the outdated version, corrupt, broken, incompatible drivers for example graphics drivers, audio drivers, etc.
Step 2: Download and then install the Update Windows 10 Drivers.
Step 3: Restart Your Computer
In the Last step that your procedure is restarting your system, after which you are free from Fix Start menu and taskbar not working error.
Solution 3: Using Windows PowerShell
PowerShell is a call upon line utility tool which can be utilized here to Fix Start menu and taskbar not working kind of issue. In this technique, we will reinstall the software application. Once in a while introducing the software error might be happening as a result of which the establishment method stays split, and it might give mistake while running the software. So by reinstalling the product issue can be effectively settled. To reinstall any software you have to take the given steps:
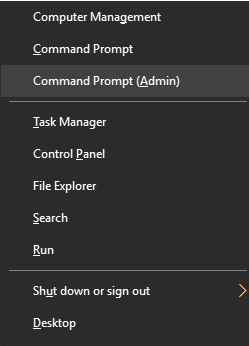
Step 1: Right-click on Start Menu
Step 2: Open Command Prompt (Always remember to run a command prompt as admin)
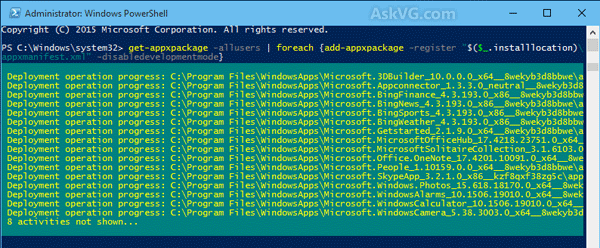
Step 3: Type PowerShell in command prompt and press Enter
Step 4: After writing the PowerShell command, you need to write this in command prompt
“Get-AppXPackage -AllUsers | Foreach {Add-AppxPackage -DisableDevelopmentMode -Register “$($_.InstallLocation)\AppXManifest.xml”}”, press enter.
Step 5: Close PowerShell
Step 6: Change the directory address to C:/Users/name/AppData/Local/
Step 7: Now Delete “TileDataLayer” folder.
After following the above steps, you can successfully reinstall the software application.
Now you successfully to fix out taskbar not working on windows 10.
Still having the issue Windows 10 taskbar frozen, No need to worry here is another solution for you.
Solution 4: By Adding a New User Account to System
In this way, you need to sign out your current user account and want to create a new user account. To ride out how to create new user Account to the system.
Step 1: Open Settings App.
Step 2: Select Accounts from the setting option.
Step 3: From that list choose Family & Other Users.
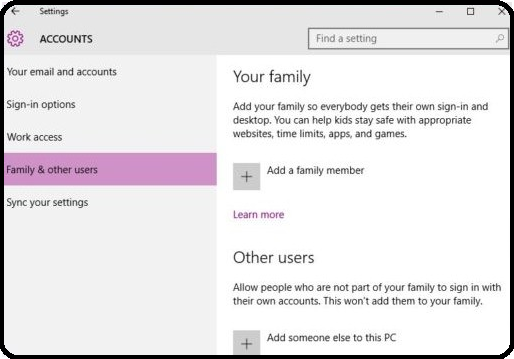
Step 4: Select option Add someone else to this PC under Other Users.
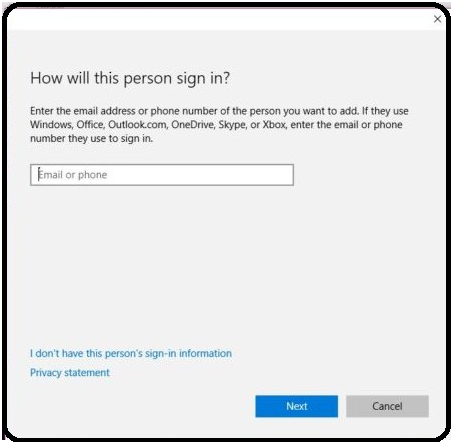
Step 5: From that list Select, I don’t have this person’s sign-in information.
Step 6: Click on the add user option.
Step 7: Create the user
Step 8: Now click on Next
Step 9: Change the account type from new account an administrator account.
Step 10: Click on OK.
If all these solutions didn’t work for them, in the last you want to reset your system.
But remember before resetting your system always takes the back-up of all your valuable data because resetting your system will delete all the data from the system. However, System Restore will keep the copy of system files.
Here in this article, we tried to cover all the essential notes, related to taskbar don’t work Windows 10. I hope you find this article helpful and it helps you to fix out your Windows 10 taskbar not working error.