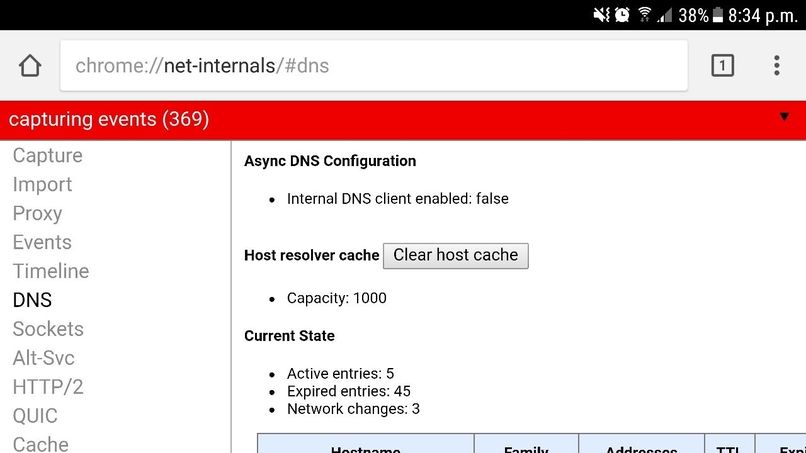
Have you ever experienced problems due to the corrupted cache and wondered how to fix it anyway? Well then, the simplest method is to visit the chrome //net-internals/#dns page and let your browser works smoothly.
While this page is generally hidden away, it helps clear your DNS cache and troubleshoot specific issues. Although the process is simple and hassle-free, you must know every single step to get the process done to avoid any further hassle.
Here, we’ll explain the chrome //net-internals/#dns command and how you can use it to ensure your connection runs smoothly. So, let’s get into it.
What is the “chrome//net-internals/#dns”?
Before we move into the guide on clearing the DNS cache using the chrome //net-internals/#dns, let’s first understand what it exactly is. Determining this tool is essential to get a better idea before proceeding with the process.
If you’re a tech-savvy internet user, you’ve probably heard of the “chrome //net-internals/#dns” command. It is used to access the Chrome browser’s internal DNS settings and can be handy when diagnosing problems with your connection or trying to speed up your browsing experience.
When you enter this command into your Chrome browser, you’ll access a page to view DNS resolution information. This is useful if you’re troubleshooting DNS issues or want to see how Chrome resolves domains. You can also use this page to clear the DNS cache. To do so, click the “Clear host cache” button. This will flush the DNS cache and reload any currently open tabs.
This command is mainly known as the Net Internals, where you can view both real-time logs and Load-post dated dumps under one roof. It mainly runs across Chrome, Opera, Microsoft Edge, and other Chromium browsers.
A step-by-step guide on clearing the chrome //net-internals/#dns
Now that you are aware of the command and its primary usage, it’s time to check out the step-by-step guide to carry out the process of clearing it for good. Follow the instructions carefully to avoid any hassle later on.
- First, launch Chrome on your system and type the chrome //net-internals/#dns command in the search bar.
- Press Enter and wait for a few seconds to open the page.
- A new window will appear on the screen, where you must tap the Clear Host Cache option. It might take a few seconds to complete the process.
- Once done, start the browser again, and go to the chrome //net-internals/#sockets to terminate the socket pools. That completes the process, and you can now use the browser again without any glitches or interruptions.
What if chrome //net-internals/#dns stops working?
While the chrome //net-internals/#dns command is mainly used to clear the DNS cache, it is eventually a code and is prone to errors. So, if you’ve been encountering the “chrome //net-internals/#dns not working” error, don’t worry, as there are a few things you can do to fix it.
- Try restarting your computer, as this is often the simplest and most effective way to fix minor errors like this one. It terminates the tiny bugs that might trigger the problem in your browser, so you can enjoy browsing the internet again.
- Another thing you can give a try is resetting your IP address. You can do this by entering “ipconfig /release” and “ipconfig /renew” into the Command Prompt on Windows or using the ifconfig tool on Linux/macOS.
- If you’re still having trouble, try flushing your DNS resolver cache. This can be done by typing “ipconfig /flushdns” into the Command Prompt on Windows or using the dscacheutil utility on macOS.
- Finally, if none of the above methods work, you can try changing your DNS server settings. To do this, launch the Control Panel and go to Network and Internet > Network Connections > Local Area Connection > Properties > Internet Protocol Version 4 (TCP/IPv4), and you are now done.
Conclusion
So, that’s all about clearing the chrome //net-internals/#dns. Clearing the DNS cache using this command is a straightforward process that requires minimal effort. The page will automatically reload, and all cached DNS records will be removed from your system, allowing a faster web browsing experience.
Whether you are trying to speed up your internet connection or fix any issues related to DNS, knowing how to clear this page can come in handy. Feel free to share your feedback in the comment section below, and stay tuned for more such updates.

